📬 Mailing Configuration
PROMPT supports customizable email communication. This guide explains how to configure mailing settings and use email templates effectively.
🧩 Course-Wide Mailing Settings
You can access the course-wide mailing settings under the "Settings" entry in the course sidebar. (The separate "Mailing" entry is for sending campaigns, not for configuration.)
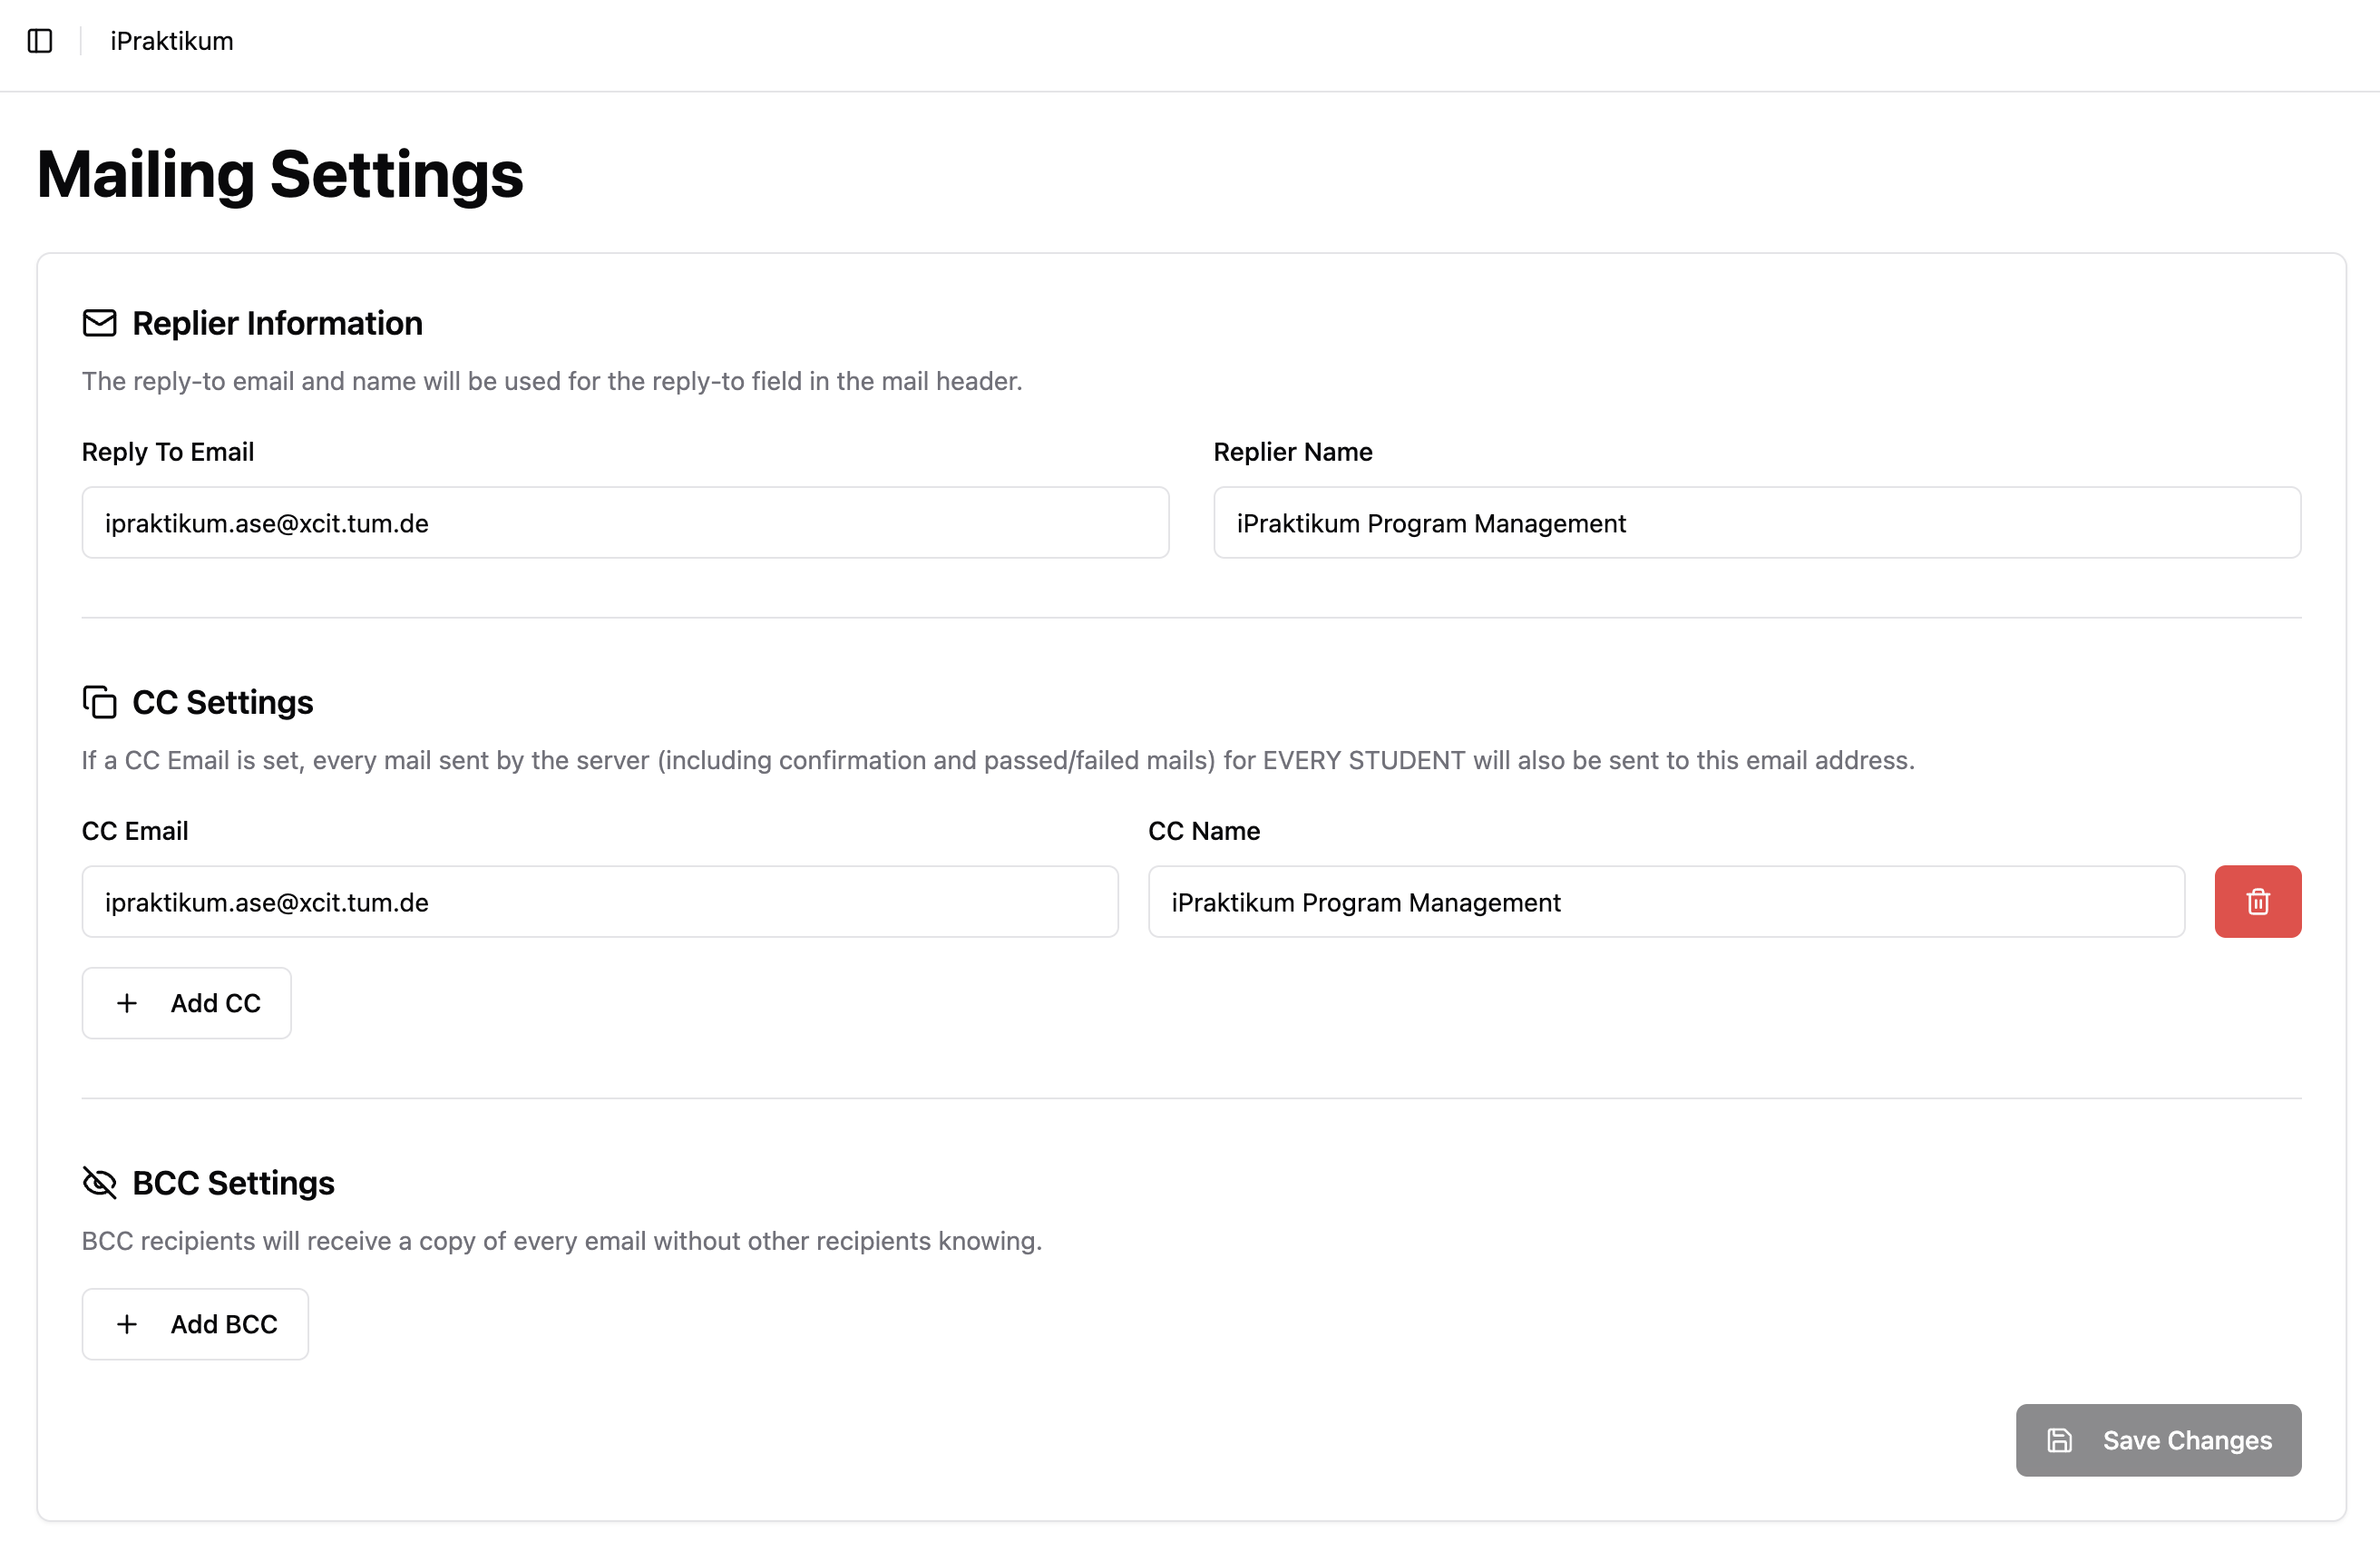
✉️ Reply-To Email Address (Required)
- This is the email address students can reply to when they receive mails from prompt.
- It must be a valid and monitored address (e.g.,
course-team@example.com). - This is a mandatory field. You cannot send mails without specifying a reply-to email.
📥 CC / BCC Email Addresses (Optional)
- CC (Carbon Copy): All outgoing emails will also be sent to these addresses, visible to recipients.
- BCC (Blind Carbon Copy): Outgoing emails will be sent to this addresses without students seeing it.
- This is useful for archiving communications, quality assurance, or confirming that messages were sent.
💡 Tip: Use BCC to log all student communication without exposing internal email addresses.
📤 Course Phase-Specific Mailing Settings
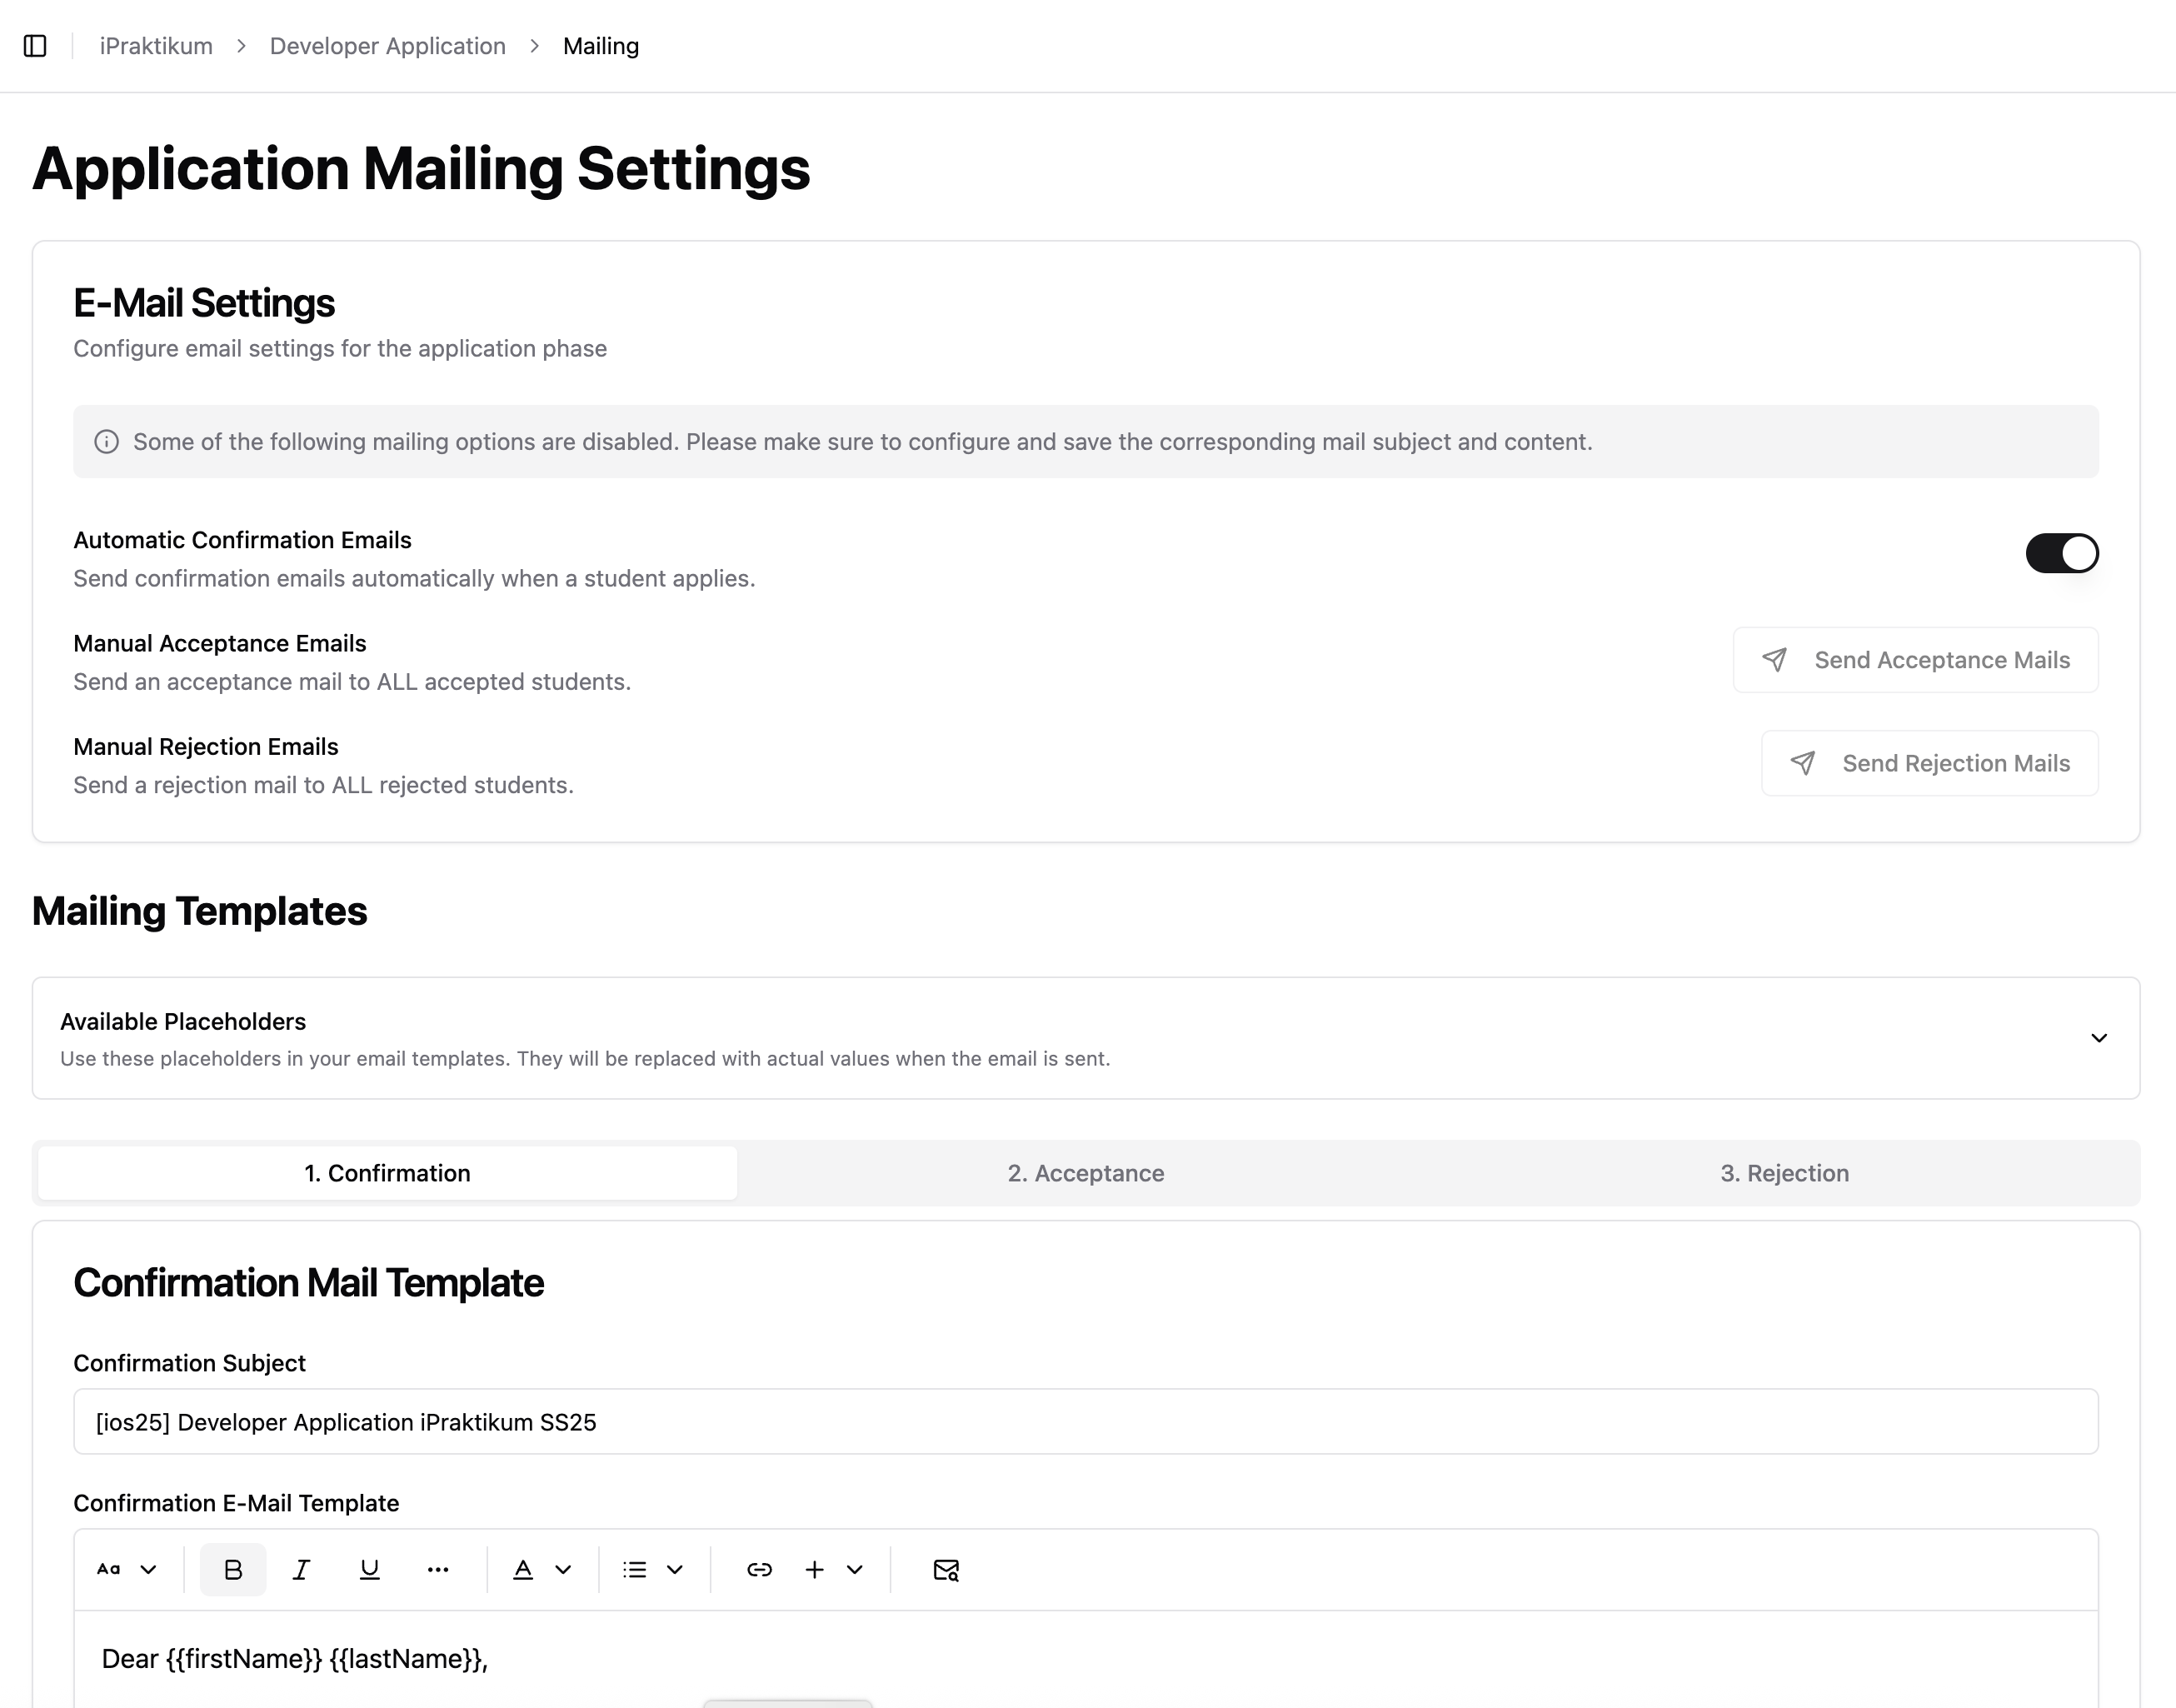
Each course phase that supports email communication (e.g., Application Phase) includes a “Mailing” section in its sidebar. From there, you can:
- Write or edit email templates
- Trigger email delivery
- Configure automatic mailing behavior
✍️ Available Email Templates
The course phase services offer the following mail options:
| Mail Type | Available In | Description |
|---|---|---|
| Confirmation Mail | Application Phase only | Sent immediately after a student submits an application |
| Acceptance/Passed | All applicable phases | Sent to students who have passed or been accepted |
| Rejection/Failed | All applicable phases | Sent to students who did not pass or were rejected |
Each template includes:
- Subject: The email subject line
- Body: A rich text editor that supports formatting and placeholders
🔧 Placeholders
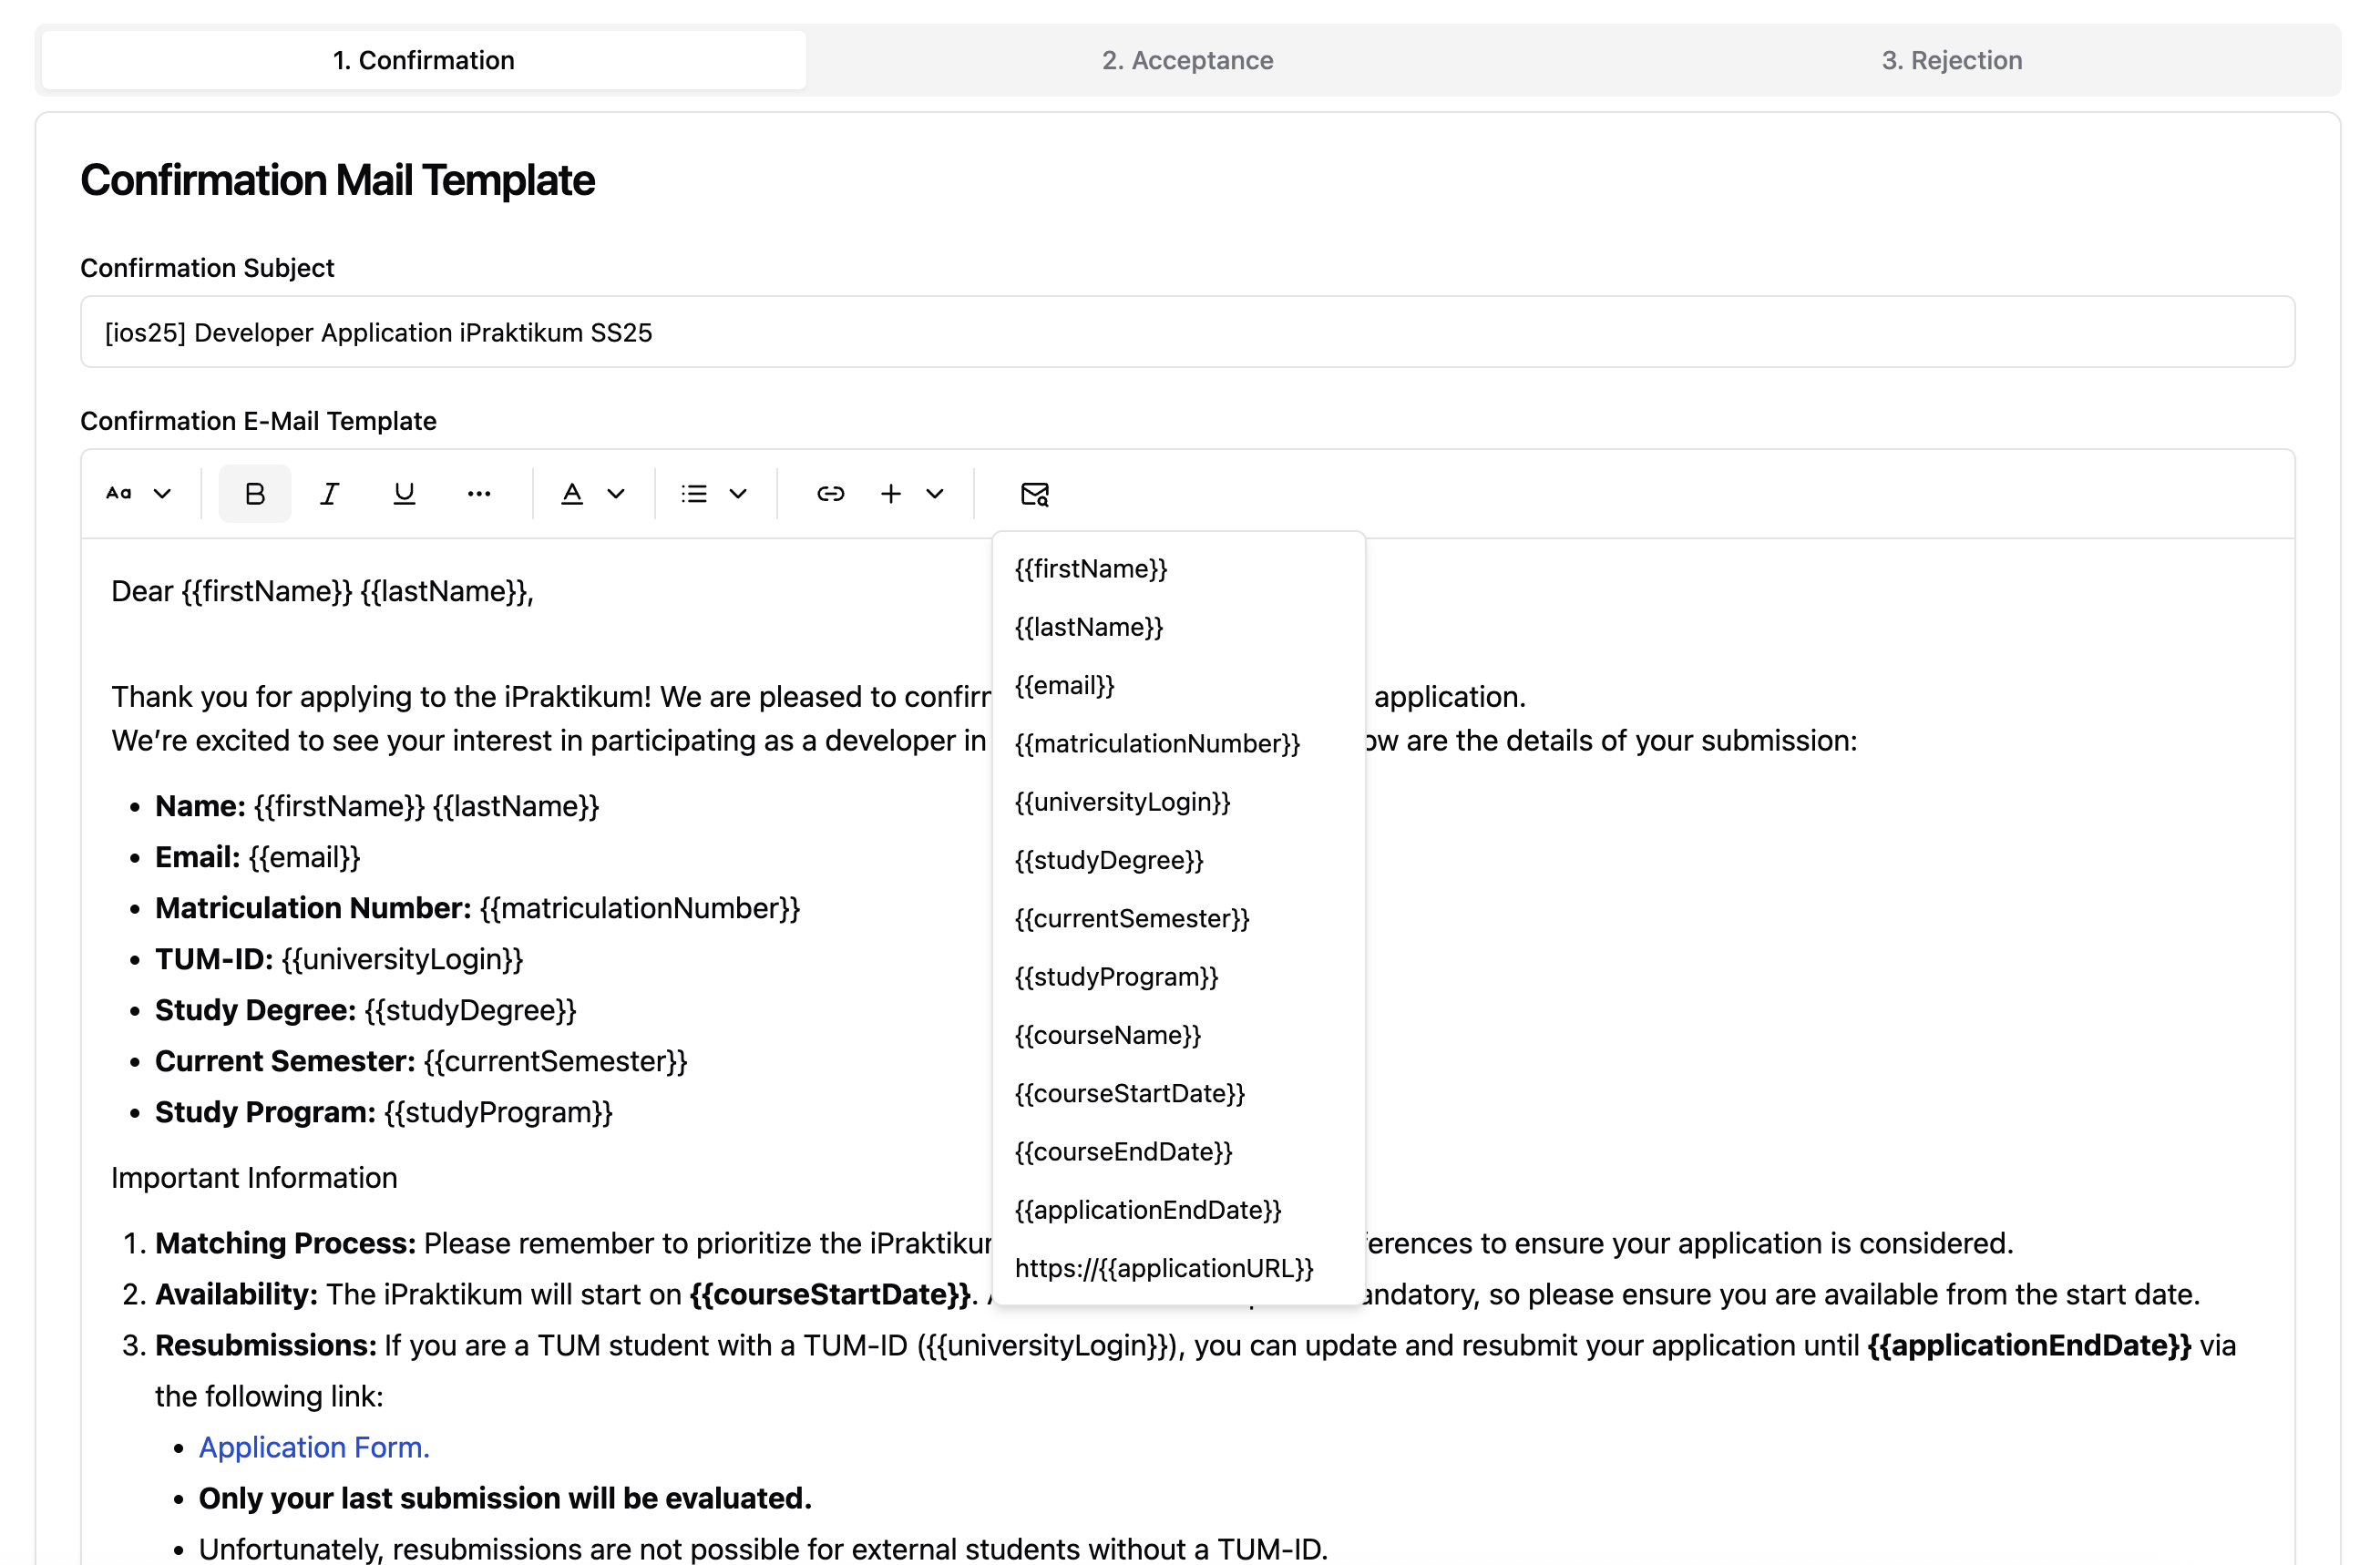
You can personalize emails using placeholders that are automatically replaced with real values during sending. You can find all available placeholders by clicking envelope icon in the rich text editor (see screenshot).
Examples (not exhaustive list):
| Placeholder | Replaced With |
|---|---|
{{firstName}} | Student's first name |
{{lastName}} | Student's last name |
{{courseName}} | Name of the current course |
{{coursePhaseName}} | Current phase name |
📩 Sending Emails
At the top of the Mailing page in each course phase, you’ll find toggles and actions for controlling mail delivery:
1. ✅ Auto-Send Confirmation Mail (Application Phase Only)
- When enabled, students automatically receive the confirmation email immediately after submitting their application.
- Useful for letting students know their application was successfully received.
2. 📤 Send Acceptance / Passed Emails
- Sends the Acceptance or Passed email to all students who passed the course phase.
- Requires manual confirmation before sending.
- ⚠️ This action is one-time: the system does not track if an email has already been sent.
3. 📤 Send Rejection / Failed Emails
- Sends the Rejection or Failed email to all students who did not pass the course phase.
- As with acceptance mails, the system does not track delivery status, so use this action with care.
Students who do not have a status assigned, when sending out the mails, will not receive any email.
📨 Course Mailing Campaigns
Beyond the per-phase status mails, every course has a Mailing entry in the course sidebar for composing, saving, and sending reusable email campaigns to a chosen group of students.
Creating a campaign
- Open Mailing from the course sidebar and click New mail.
- Give the campaign a name (internal, for your overview only).
- Choose the course phase and one or more student statuses (
Passed,Failed,Not assessed, or All participants). Recipients are the deduplicated union of the selected statuses in that phase. - Write the subject and body using the same rich-text editor and placeholders as the other
mailing pages (e.g.
{{firstName}},{{courseName}}). - Optionally set a reply-to override for this campaign; otherwise the course-wide reply-to (and CC/BCC) is used.
- Click Save to store the campaign as a draft. Drafts can be edited or deleted later.
Previewing recipients
Use Show recipients to see exactly who will receive the mail before sending. The list is resolved live from the current participations, so save your changes first to refresh it.
Testing and sending
- Test send delivers a single rendered copy to your own email address (placeholders filled from a sample recipient) so you can proof-read before the real send.
- Send asks you to confirm the exact number of recipients, then dispatches the emails in the background. Recipients are resolved live at send time. Only lecturers (and admins) can send; editors can prepare drafts.
Tracking, copying, and resending
The overview lists every campaign with its status (Draft, Sending, Sent, Partially failed,
Failed), recipient success/failure counts, and metadata (created by, last changed, sent at). You
can:
- Copy a campaign into a new draft to reuse and re-send it.
- Resend to failed: retry delivery to only the recipients whose previous send failed.
- Delete a campaign (not while it is sending).
Each send is tracked per recipient, so failed addresses (e.g. students without an email) are clearly flagged and can be retried.
✅ Best Practices
- Use BCC logging to maintain an audit trail.
- Avoid re-sending acceptance/rejection mails unless necessary.
- Include contact information in your reply-to address to allow follow-up questions from students.